How to Picture Frame a Deck: Proper Framing & Blocking

Looking for guidance on how to picture frame a deck? You’ve come to the right place.
BEFORE YOU BEGIN, make sure you’ve properly spaced and blocked your deck joists and that your deck’s substructure is healthy. Please consult all appropriate installation guides.
WHAT TO KNOW BEFORE YOU BUILD
Design Details >
This guide assumes the use of square-shoulder 5.5″ deck boards and 1/8″ spacing in a straight, edge-to-edge pattern, with the exception of the border.
Railing Details >
Your railing will either be installed top of the deck boards after their own installation, or you will need to trim your deck boards around the structural 4×4 posts.
How to Picture Frame a Deck: Installation Tips
Estimated based on a 16′ x 20′ deck; time will vary depending on the size of deck and complexity of the build.
OVERVIEW
- Step 1: Install Suggested Blocking
- Step 2: Cut Your Picture Frame Deck Boards
- Step 3: Fasten Your Picture Frame Deck Boards
- Step 4: Fasten Your Infill Deck Boards
- Step 5: Prolong the Aesthetics of Your Deck
TOOLS YOU’LL NEED
- Safety glasses
- Power miter saw / circular saw
- Cordless driver
- Exterior-grade construction screws
- Measuring tape
- Carpenter square
- Cordless drill
- Recommended fasteners and installation tools
CHECK YOUR DECK
Do not move forward until you’ve confirmed your deck frame is structurally sound.
Step 1: Install Suggested Blocking
BLOCKING YOUR PICTURE FRAME
- Picture framing requires additional blocking.
- When a deck board runs the same direction as the joists, additional blocking / joists must be installed to your existing substructure to adequately support and fasten the deck board.
- All infill deck boards that meet a picture frame border must be fully supported beneath the ends of each board.
- All additional framing / blocking must be in plane across the tops of existing framing members.
- All blocking / framing must be attached / installed using exterior-grade screws. DO NOT use nails.
- Additional blocking / joists can be installed at 16″ on center, maximum. However, consider installing blocking / joists at 12″ on center for a more rigid feel.
Your Decking Masterpiece Needs a Frame
Choose whether you’ll add a single, double, or triple picture frame border to your deck, then get the how-to.
SINGLE PICTURE FRAME BLOCKING METHOD
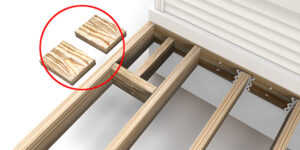
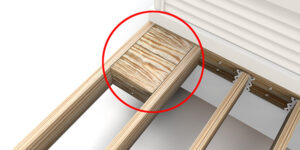
Use 2″ x 6″ flat blocking to support the mitered corner.
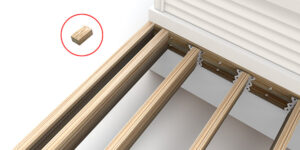
1. Add Blocking to Corners
- Place a solid block at all four corners of the deck to support the frame.
- You will add blocking at even intervals along the perimeter.

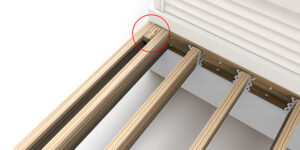
2. Continue Blocking Edge
- Block: 2″ x 6″. Length of blocking: 3.25″.
- Continue applying blocking along the edge of the deck frame at an interval of 16″.

3. Add Second Support Joist
- Add a joist to support the infill deck boards.
- Place another joist flush along the length of the first.
- Fasten double joist together with screws.
- Maintain all other spacing.

4. Block Substructure
- Space joists at 16″ on center, max, and double joists to support infill.
DOUBLE PICTURE FRAME BLOCKING METHOD
Use 2″ x 6″ flat blocking to support the mitered corner.

1. Add Blocking to Corners
- Place a solid block at all four corners of the deck, leaving 11″ clear space between the inside of the block and the corner. Corner blocking should be 9″ x 11″.

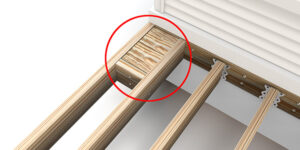
2. Add Corner Support Joist
- Place corner support joist perpendicular to the blocking.
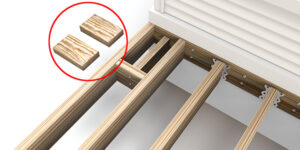
3. Add Two Flat Blocks
- Use two (2) corner blocks, each 2″ x 6,” cut to 9″ length. Combined length of blocking: 18″.

4. Continue Blocking Edge
- Continue applying blocking along the edge of the deck frame at an interval of 16″ on-center, max.

5. Add Second Support Joist
- Add a joist to support the infill deck boards.
- Place another joist flush along the length of the first.
- Fasten double joist together with screws.
- Maintain all other spacing.

6. Block Substructure
- Space joists at 16″ on center, max, and double joists to support infill.
TRIPLE PICTURE FRAME BLOCKING METHOD
Use 2″ x 8″ flat blocking to support the mitered corner.

1. Add Blocking to Corners
- Place a solid block at all four corners of the deck, leaving 15″ clear space between the inside of the block and the inside of the corner. Corner blocking should be 14.5″ x 16″.

2. Add Corner Support Joist
- Place corner support joist perpendicular to the blocking, which is set 1-1/2″ below the top of the joists to support those flat blocks which will be added in step 3.
3. Add Two Flat Blocks
- Use two (2) corner blocks, each 2″ x 8″, cut to 14″ length. Combined length of blocking: 29″.

4. Continue Blocking Edge
- Continue applying blocking along the edge of the deck frame at an interval of 16″ on-center, max.

5. Add Second Support Joist
- Add a joist to support the infill deck boards.
- Place another joist flush along the length of the first.
- Fasten double joist together with screws.
- Maintain all other spacing.

6. Block Substructure
- Space joists at 16″ on center, max, and double joists to support infill.
Step 2: Cut Your Picture Frame Deck Boards
For cutting TimberTech capped composite or capped polymer deck boards, make sure to use an appropriate saw.
NOTE: Do not use cordless saws.
CUTTING TOOLS

Power Miter Saw
FOR CUTTING TIMBERTECH DECK BOARDS:
Use a miter saw with a fine-toothed, carbide-tipped finish trim blade (12″ 100-tooth or 10″ 80-tooth minimum for PRO/EDGE, 90-tooth minimum for Advanced PVC).
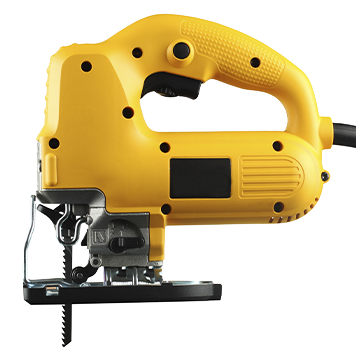
Jig Saw
FOR NOTCHING AROUND RAIL POSTS:
Use a fine-tooth blade. (NOTE: Jig saw can also be used to cut Composite decking).

Electric Circular Saw
OTHER METHOD FOR CUTTING TIMBERTECH DECK BOARDS:
Use a 60-tooth fine-finish blade. (NOTE: Electric circular saw can also be used to cut Advanced PVC decking).
TIPS FOR CUTTING PICTURE FRAME DECK BOARDS
- Use the proper saw and blade.
- Cut boards one at a time.
- Confirm that you’re cutting at a 45-degree angle.
- Measure and cut your deck boards to length using a power miter saw or sliding compound power miter saw, depending on board width.
- Measure twice and cut once.
- Review additional info on how to cut TimberTech Advanced PVC decking.

Step 3: Fasten Your Picture Frame Deck Boards
FASTENING TOOLS

Cordless Drill
For TimberTech Advanced PVC and Composite
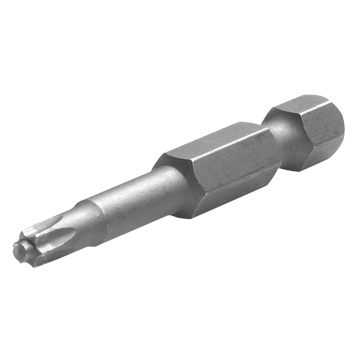
T-Tap Driver Bit
For TimberTech Advanced PVC
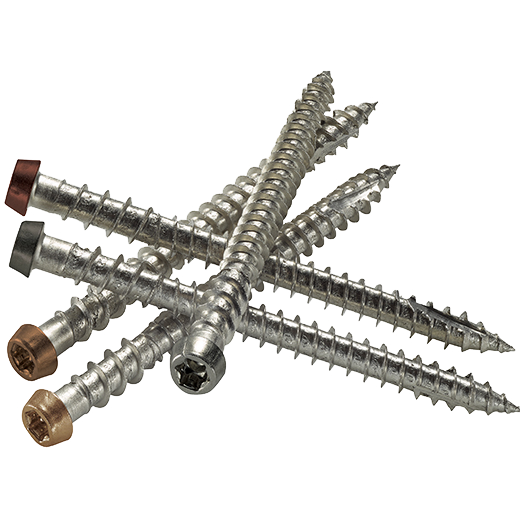
TOPLoc Color-Matched Fasteners
For TimberTech Advanced PVC
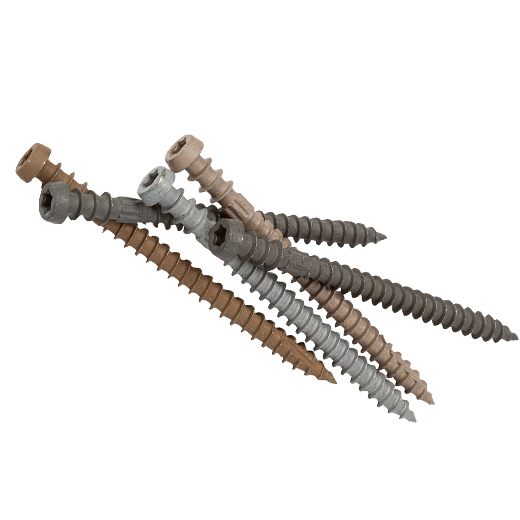
TOPLoc Color-Matched Fasteners
For TimberTech Composite
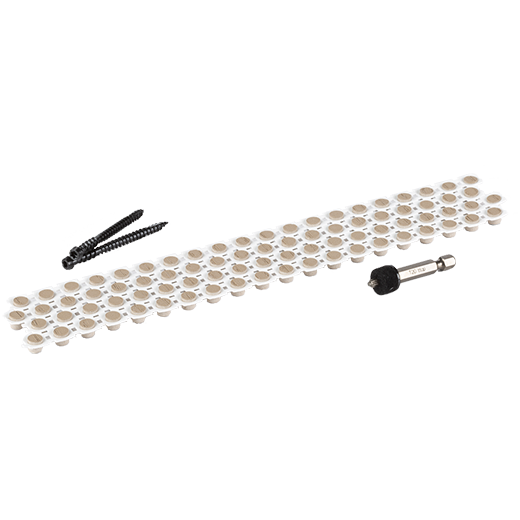
Cortex® Fasteners
For TimberTech Advanced PVC
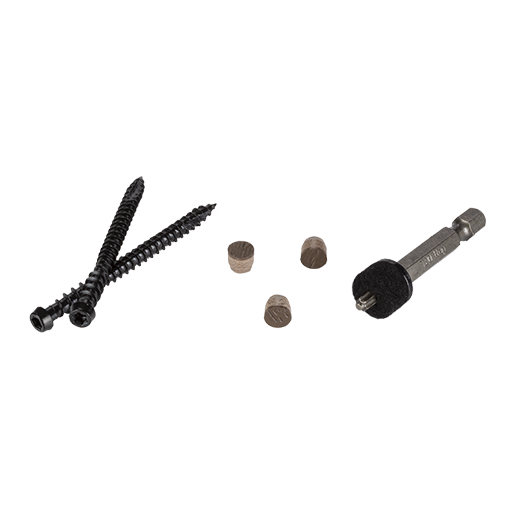
Cortex® Fasteners
For TimberTech Composite
FASTENING FOR SINGLE PICTURE FRAME

Step 1: Lay Your Boards & Space Fasteners
- Achieve a clean finished look by allowing the picture frame border boards to overhang the outside wood rim joist by ¾”.
- Installing TimberTech Advanced PVC fascia boards, each of which is ½” thick, will leave a slight (¼”) overhang of the picture frame border.

Step 2: Check Your Fastener Position
- For TimberTech Advanced PVC deck boards: You will need three (3) TOPLoc® for Advanced PVC color-matched deck screws, or Cortex®, evenly spaced on both sides of the miter (pictured). Pre-drilling not required for TimberTech Advanced PVC deck boards.
- Miters must be tight prior to fastening.
- Fasten along the mitered edge of each picture frame board within ½” of the edge.
- For TimberTech Composite deck boards: You will need two (2) TOPLoc #8 x 2 ½” deck screws, evenly spaced screws on both sides of the miter. Pre-drill the screws.
- Fasten along the mitered edge of each picture frame board at a minimum of ¾” from any board edge.

Step 3: Fasten Your Frame Boards
- Border board can be flush to the wood rim if no rim joist is used, or can hang over up to ¾” if TimberTech Advanced PVC fascia is installed.
- Installing TimberTech Advanced PVC fascia boards, each of which is ½” thick, will leave a slight (¼”) overhang of the picture frame border.
FASTENING FOR DOUBLE PICTURE FRAME

Step 1: Lay Your Boards & Space Fasteners
- Achieve a clean finished look by allowing the picture frame border boards to overhang the outside wood rim joist by ¾”.
- Installing TimberTech Advanced PVC fascia boards, each of which is ½” thick, will leave a slight (¼”) overhang of the picture frame border.

Step 2: Check Your Fastener Position
- Picture framing with TimberTech Advanced PVC deck boards:
- You will need three (3) TOPLoc® for Advanced PVC color-matched deck screws, or Cortex®, evenly spaced on both sides of the miter (pictured). Pre-drilling not required for TimberTech Advanced PVC deck boards.
- Miters must be tight prior to fastening.
- Fasten along the mitered edge of each picture frame board within ½” of the edge.
- Picture framing with TimberTech Composite deck boards: You will need two (2) TOPLoc #8 x 2 ½” deck screws, evenly spaced screws on both sides of the miter. Pre-drill the screws.
- Fasten along the mitered edge of each picture frame board at a minimum of ¾” from any board edge.

Step 3: Fasten Your Frame Boards
- Border board can be flush to the wood rim if no rim joist is used, or can hang over up to ¾” if TimberTech Advanced PVC fascia is installed.
- Installing TimberTech Advanced PVC fascia boards, each of which is ½” thick, will leave a slight (¼”) overhang of the picture frame border.
FASTENING FOR TRIPLE PICTURE FRAME

Step 1: Lay Your Boards & Space Fasteners
- Achieve a clean finished look by allowing the picture frame border boards to overhang the outside wood rim joist by ¾”.
- Installing TimberTech Advanced PVC fascia boards, each of which is ½” thick, will leave a slight (¼”) overhang of the picture frame border.

Step 2: Check Your Fastener Position
- Picture framing with TimberTech Advanced PVC deck boards: You will need three (3) TOPLoc® for Advanced PVC color-matched deck screws, or Cortex®, evenly spaced on both sides of the miter (pictured). Pre-drilling not required for TimberTech Advanced PVC deck boards.
- Miters must be tight prior to fastening.
- Fasten along the mitered edge of each picture frame board within ½” of the edge.
- Picture framing with TimberTech Composite deck boards: You will need two (2) TOPLoc #8 x 2 ½” deck screws, evenly spaced screws on both sides of the miter. Pre-drill the screws.
- Fasten along the mitered edge of each picture frame board at a minimum of ¾” from any board edge.

Step 3: Fasten Your Frame Boards
- Border board can be flush to the wood rim if no rim joist is used, or can hang over up to ¾” if TimberTech Advanced PVC fascia is installed.
- Installing TimberTech Advanced PVC fascia boards, each of which is ½” thick, will leave a slight (¼”) overhang of the picture frame border.
FASTENING TIMBERTECH ADVANCED PVC PICTURE FRAME BOARDS
TimberTech Advanced PVC decking can also be installed using Cortex®.
For additional tips on TimberTech Advanced PVC installs, visit the Deck Building Resource Center.
NOTE
Step 4: Fasten Your Infill Deck Boards

To Install
The Remaining Deck Boards
- Complete fastening the picture frame boards along the perimeter of the deck.
- Measure the length between the picture frame boards:
- If using Advanced PVC decking, keep ends tight to the picture frame border.
- Each end of infill boards: Use two (2) screws within ½” ends.
- If using TimberTech Composite, provide gap at the ends of infill boards, per BUTT JOINT GAPPING REQUIREMENTS chart.
- Each end of infill boards: Pre-drill and fasten two (2) screws within ¾” from edges.
- If using Advanced PVC decking, keep ends tight to the picture frame border.
- Install the infill deck boards per the installation instructions.
NOTE
Step 5: Prolong the Aesthetics of Your Deck
While TimberTech capped composite and capped polymer decking is specifically engineered for enduring beauty, it’s always wise to keep your backyard build free of dirt, debris, and spills. To maximize the aesthetics of your deck, we recommend using TimberTech® DeckCleaner™.

USE THE APPROPRIATE BRUSH
When cleaning your TimberTech Advanced PVC decking with DeckCleaner, use a stiff, natural-fiber brush. When cleaning TimberTech Composite decking with DeckCleaner, use a medium-to-stiff nylon brush
Invest in Your Deck’s Beauty
Keep surface buildup at bay with TimberTech® DeckCleaner™ featuring our effective, non-toxic and bleach-free formula. Makes cleaning a breeze for small spots or entire deck surfaces. EXPLORE DECKCLEANER